SDK Documentation
Everything you need to integrate push notifications into your Expo app.
1Installation
Install the Exponotify SDK and required dependencies:
npx expo install @exponotify/sdk expo-notifications expo-device⚠️ Required: Configure app.json
You must add expo-notifications to your plugins array. Without this, iOS won't request notification permissions and push won't work.
// app.json
{
  "expo": {
    "plugins": [
      "expo-notifications"
    ]
  }
}
After adding this, rebuild your app with npx expo prebuild or create a new development build.
Troubleshooting: If notifications don't appear in iOS Settings → Your App → Notifications, the plugin is missing from app.json.
2Quick Start
The simplest way to get started is with the Push static API:
import { Push } from 'exponotify-sdk';

// 1. Initialize (call once at app startup)
Push.init('pk_live_your_api_key');

// 2. Identify user after login
await Push.identify('user-123', { name: 'John' });

// 3. Register for push when ready
const token = await Push.register();3Platform Setup
Configure push notification credentials for iOS and Android.
🍎 iOS (APNs)
iOS push notifications work automatically with Expo's push service. No additional setup required!
🤖 Android (FCM) — Required Setup
Android requires Firebase Cloud Messaging credentials. Without this, all Android notifications will fail.
1. Create Firebase Project
Go to Firebase Console → Create or select a project
2. Generate Service Account Key
Project Settings → Service accounts → Generate new private key → Download JSON file
3. Upload to Expo
Option A: Via CLI
eas credentials\n# Select: Android → Push Notifications → Add FCM V1 Service Account KeyOption B: Via expo.dev → Your project → Credentials → Android → FCM V1 service account key
4. Rebuild Your App
eas build --platform android4Identify Users
Call identify() when a user logs in. This works before push registration, so users appear in your dashboard immediately.
// Identify user with optional attributes
await Push.identify('user-123', {
  name: 'John Doe',
  email: 'john@example.com',
  plan: 'premium'
});

// Or just the user ID
await Push.identify('user-123');
💡 Tip: Call identify() right after login, even before requesting push permissions. This lets you track users and set attributes before they enable notifications.
5User Attributes
Set custom attributes to segment and target users:
// Set a single attribute
await Push.set('onboardingComplete', true);
await Push.set('plan', 'premium');
await Push.set('age', 25);

// Add tags (stored as JSON array)
await Push.tag('vip', 'beta-user', 'early-adopter');

// Set multiple attributes at once
await Push.setUser({
  name: 'John',
  email: 'john@example.com',
  country: 'US',
  signupDate: '2024-01-15'
});6Push Registration
Request push notification permissions and register the device:
// Register for push notifications
// This will prompt the user for permission
const token = await Push.register();

if (token) {
  console.log('Push token:', token);
} else {
  console.log('Permission denied or not a physical device');
}

// Check if registered
if (Push.isReady()) {
  // Device is registered and ready
}

// Get the current token
const currentToken = Push.getToken();
⚠️ Note: Push notifications only work on physical devices. The SDK will return null on simulators/emulators.
7Event Tracking
The SDK automatically tracks notification delivery and opens. You can also handle logout:
// Logout current user (keeps device registered)
await Push.logout();

// Unsubscribe from push notifications entirely
await Push.unsubscribe();8React Hooks
For more control, use the React hooks API:
import {
  useExponotify,
  useNotificationOpened,
  useNotificationReceived
} from 'exponotify-sdk';

function App() {
  const {
    token,
    isRegistered,
    isLoading,
    register,
    identify
  } = useExponotify();

  // Handle notification opens (taps)
  useNotificationOpened((data) => {
    console.log('User tapped notification:', data);
    // Navigate to deep link, etc.
  });

  // Handle foreground notifications
  useNotificationReceived((notification) => {
    console.log('Received in foreground:', notification);
  });

  return (
    <Button
      onPress={() => register(userId)}
      disabled={isLoading}
    >
      {isRegistered ? 'Registered ✓' : 'Enable Notifications'}
    </Button>
  );
}9Troubleshooting
Common issues and how to fix them.
❌ Android: "Unable to retrieve the FCM server key"
All Android push notifications fail with this error:
Unable to retrieve the FCM server key for the recipient's app. Make sure you have provided a server key as directed by the Expo FCM documentation.Cause: FCM credentials are not configured in Expo.
Fix: Follow the Platform Setup guide to upload your Firebase service account key to Expo.
❌ Notifications not showing in iOS Settings
If you go to Settings → Your App and don't see "Notifications" listed, the app has never requested notification permissions.
Cause: Missing expo-notifications in your app.json plugins array.
Fix:
// app.json
{
  "expo": {
    "plugins": [
      "expo-notifications"
    ]
  }
}
Then rebuild: npx expo prebuild --clean and reinstall the app.
⚠️ Push notifications not working on simulator
Push notifications only work on physical devices. The iOS Simulator and Android Emulator cannot receive real push notifications.
Solution: Test on a physical device using Expo Go or a development build.
⚠️ Push.register() returns null
This usually means one of:
- User denied notification permission
- Running on simulator (not supported)
- Missing expo-notifications plugin in app.json
- Network error reaching Exponotify API
Debug: Check console logs - the SDK logs detailed error messages starting with [Exponotify]
❌ 401 Unauthorized error
Your API key is invalid or missing.
- Check you're using the correct API key from the dashboard
- Make sure the key has
devices:writepermission - Verify the key hasn't been revoked
⚠️ Permission granted but notifications not received
Check these common causes:
- Device might be in Do Not Disturb mode
- App might be force-quit (iOS won't deliver to killed apps in some cases)
- Check the Exponotify dashboard - was the notification actually sent?
- For iOS: ensure you have valid APNs credentials configured
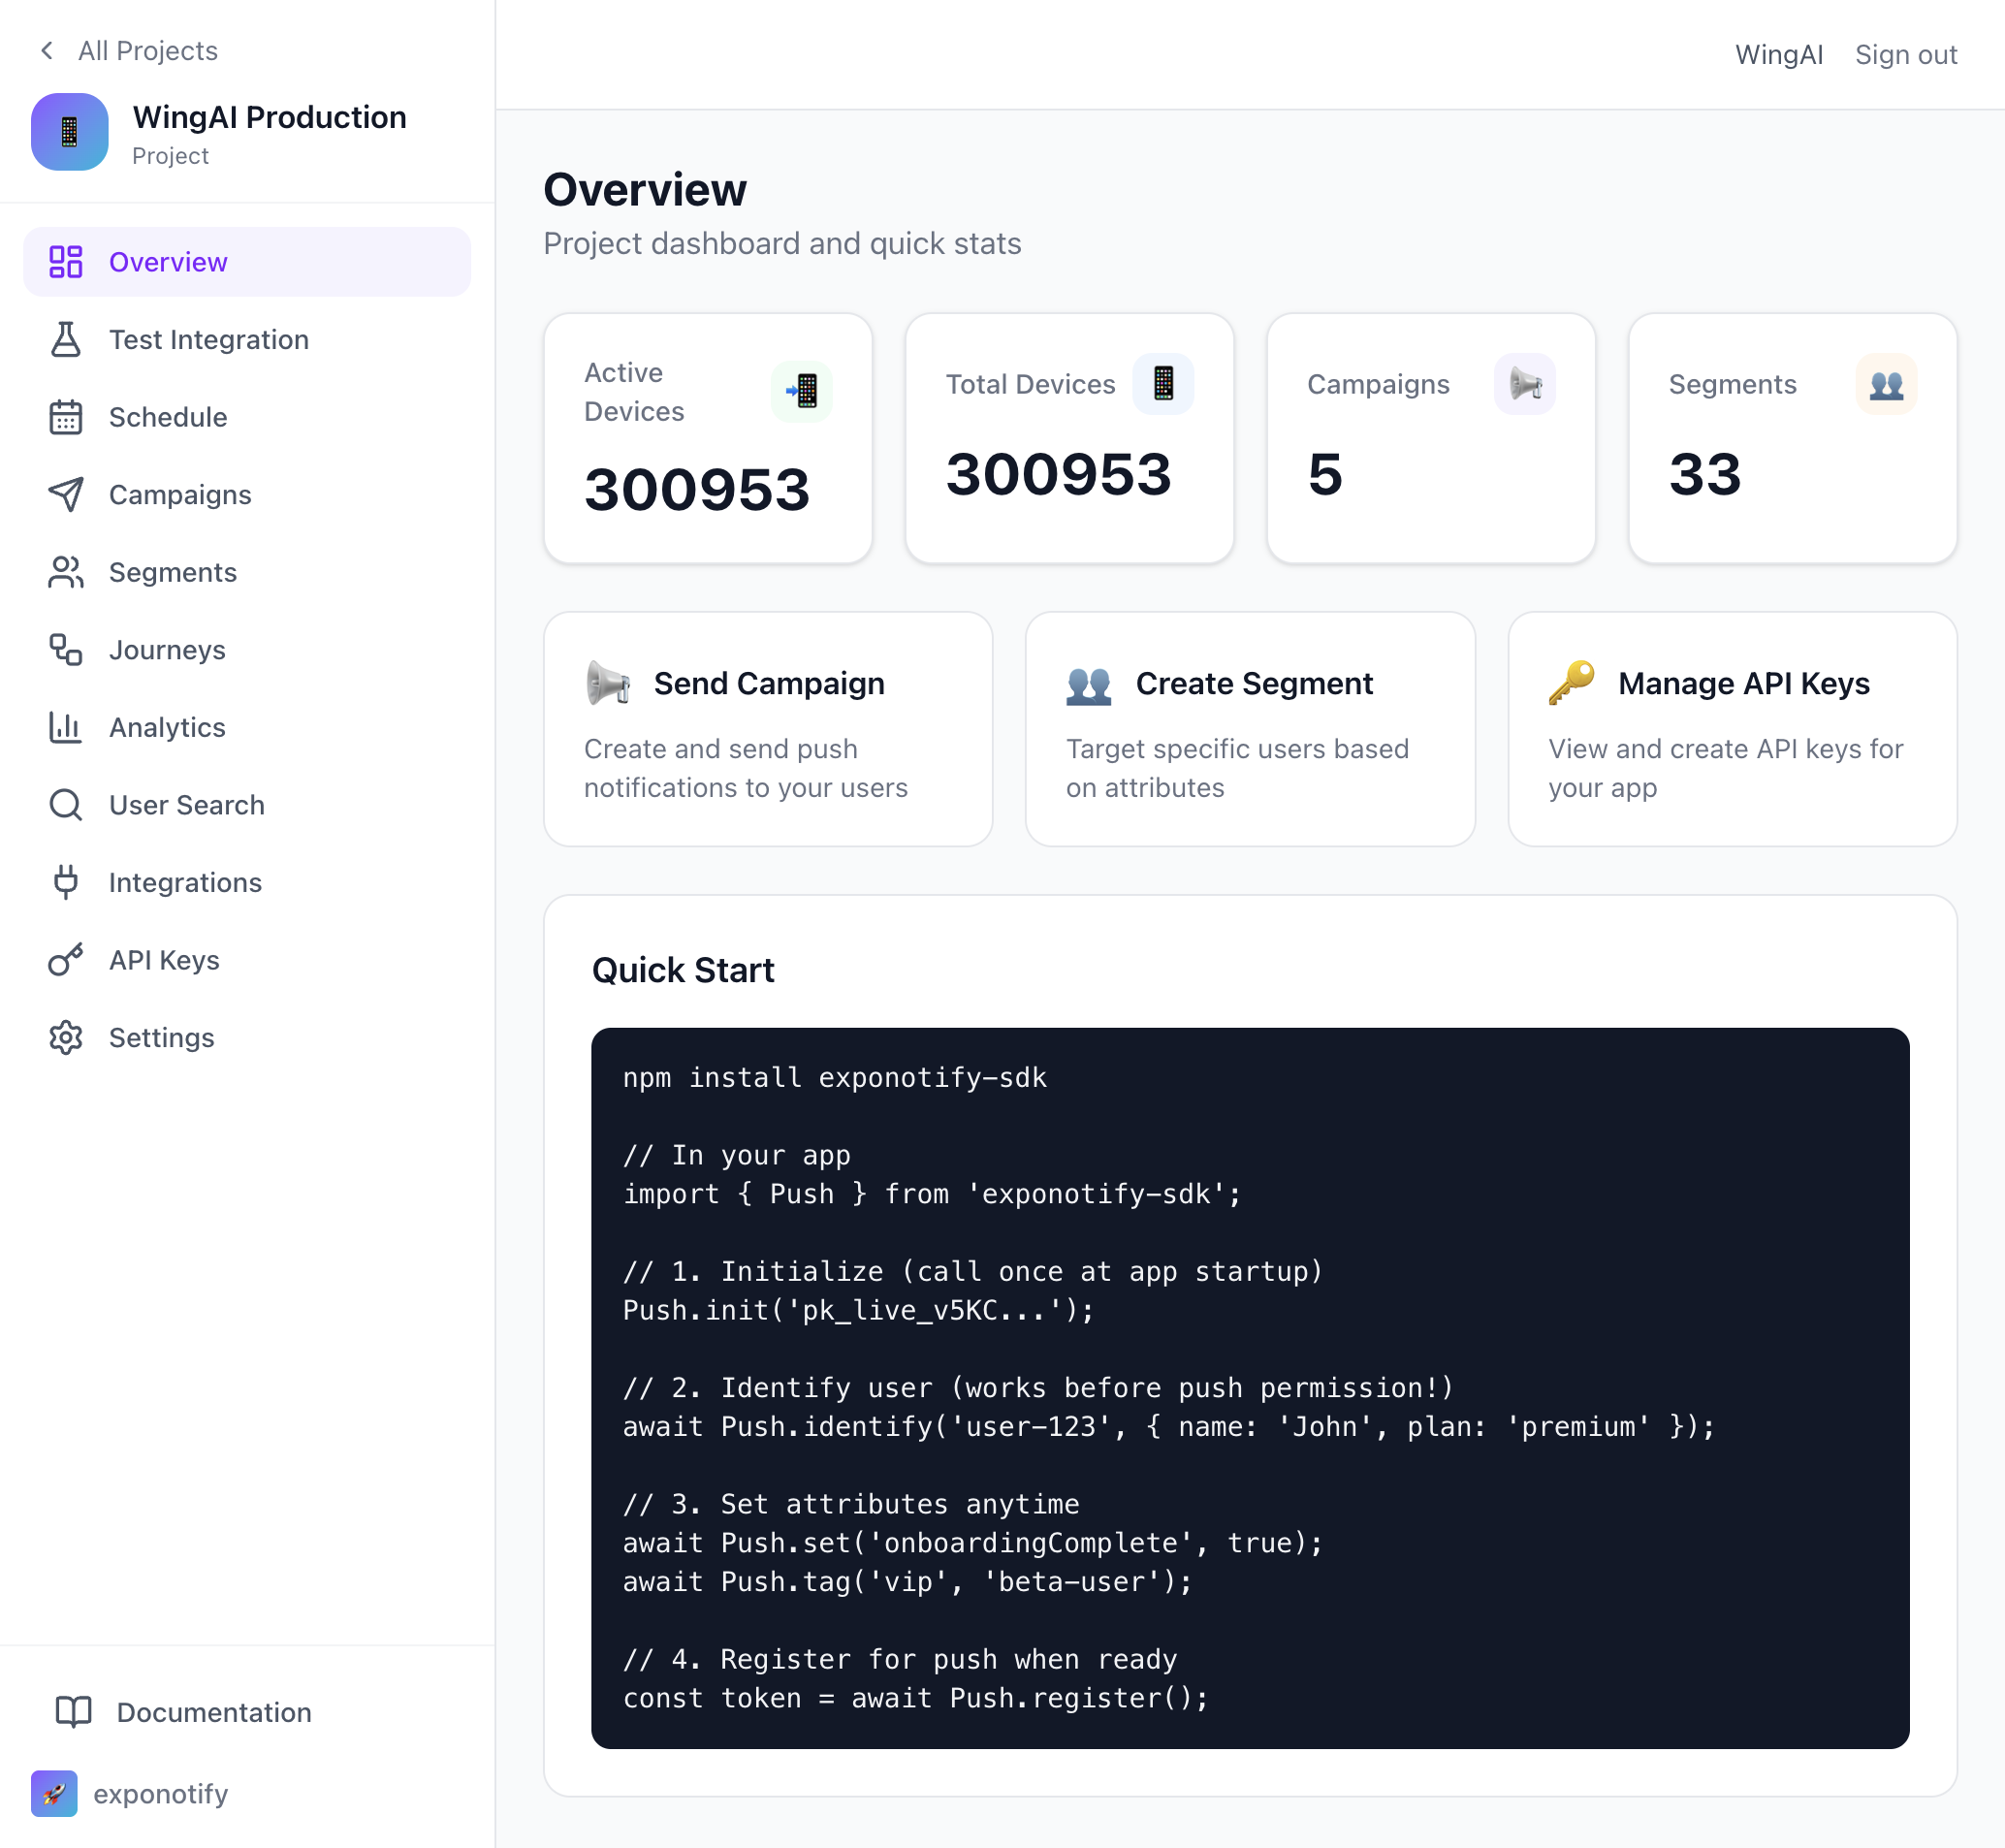
10Dashboard Tour
Explore the Exponotify dashboard to manage your push notifications, segments, and automated journeys.
🚀 Project Overview
Quick access to your project stats, with SDK integration code ready to copy.
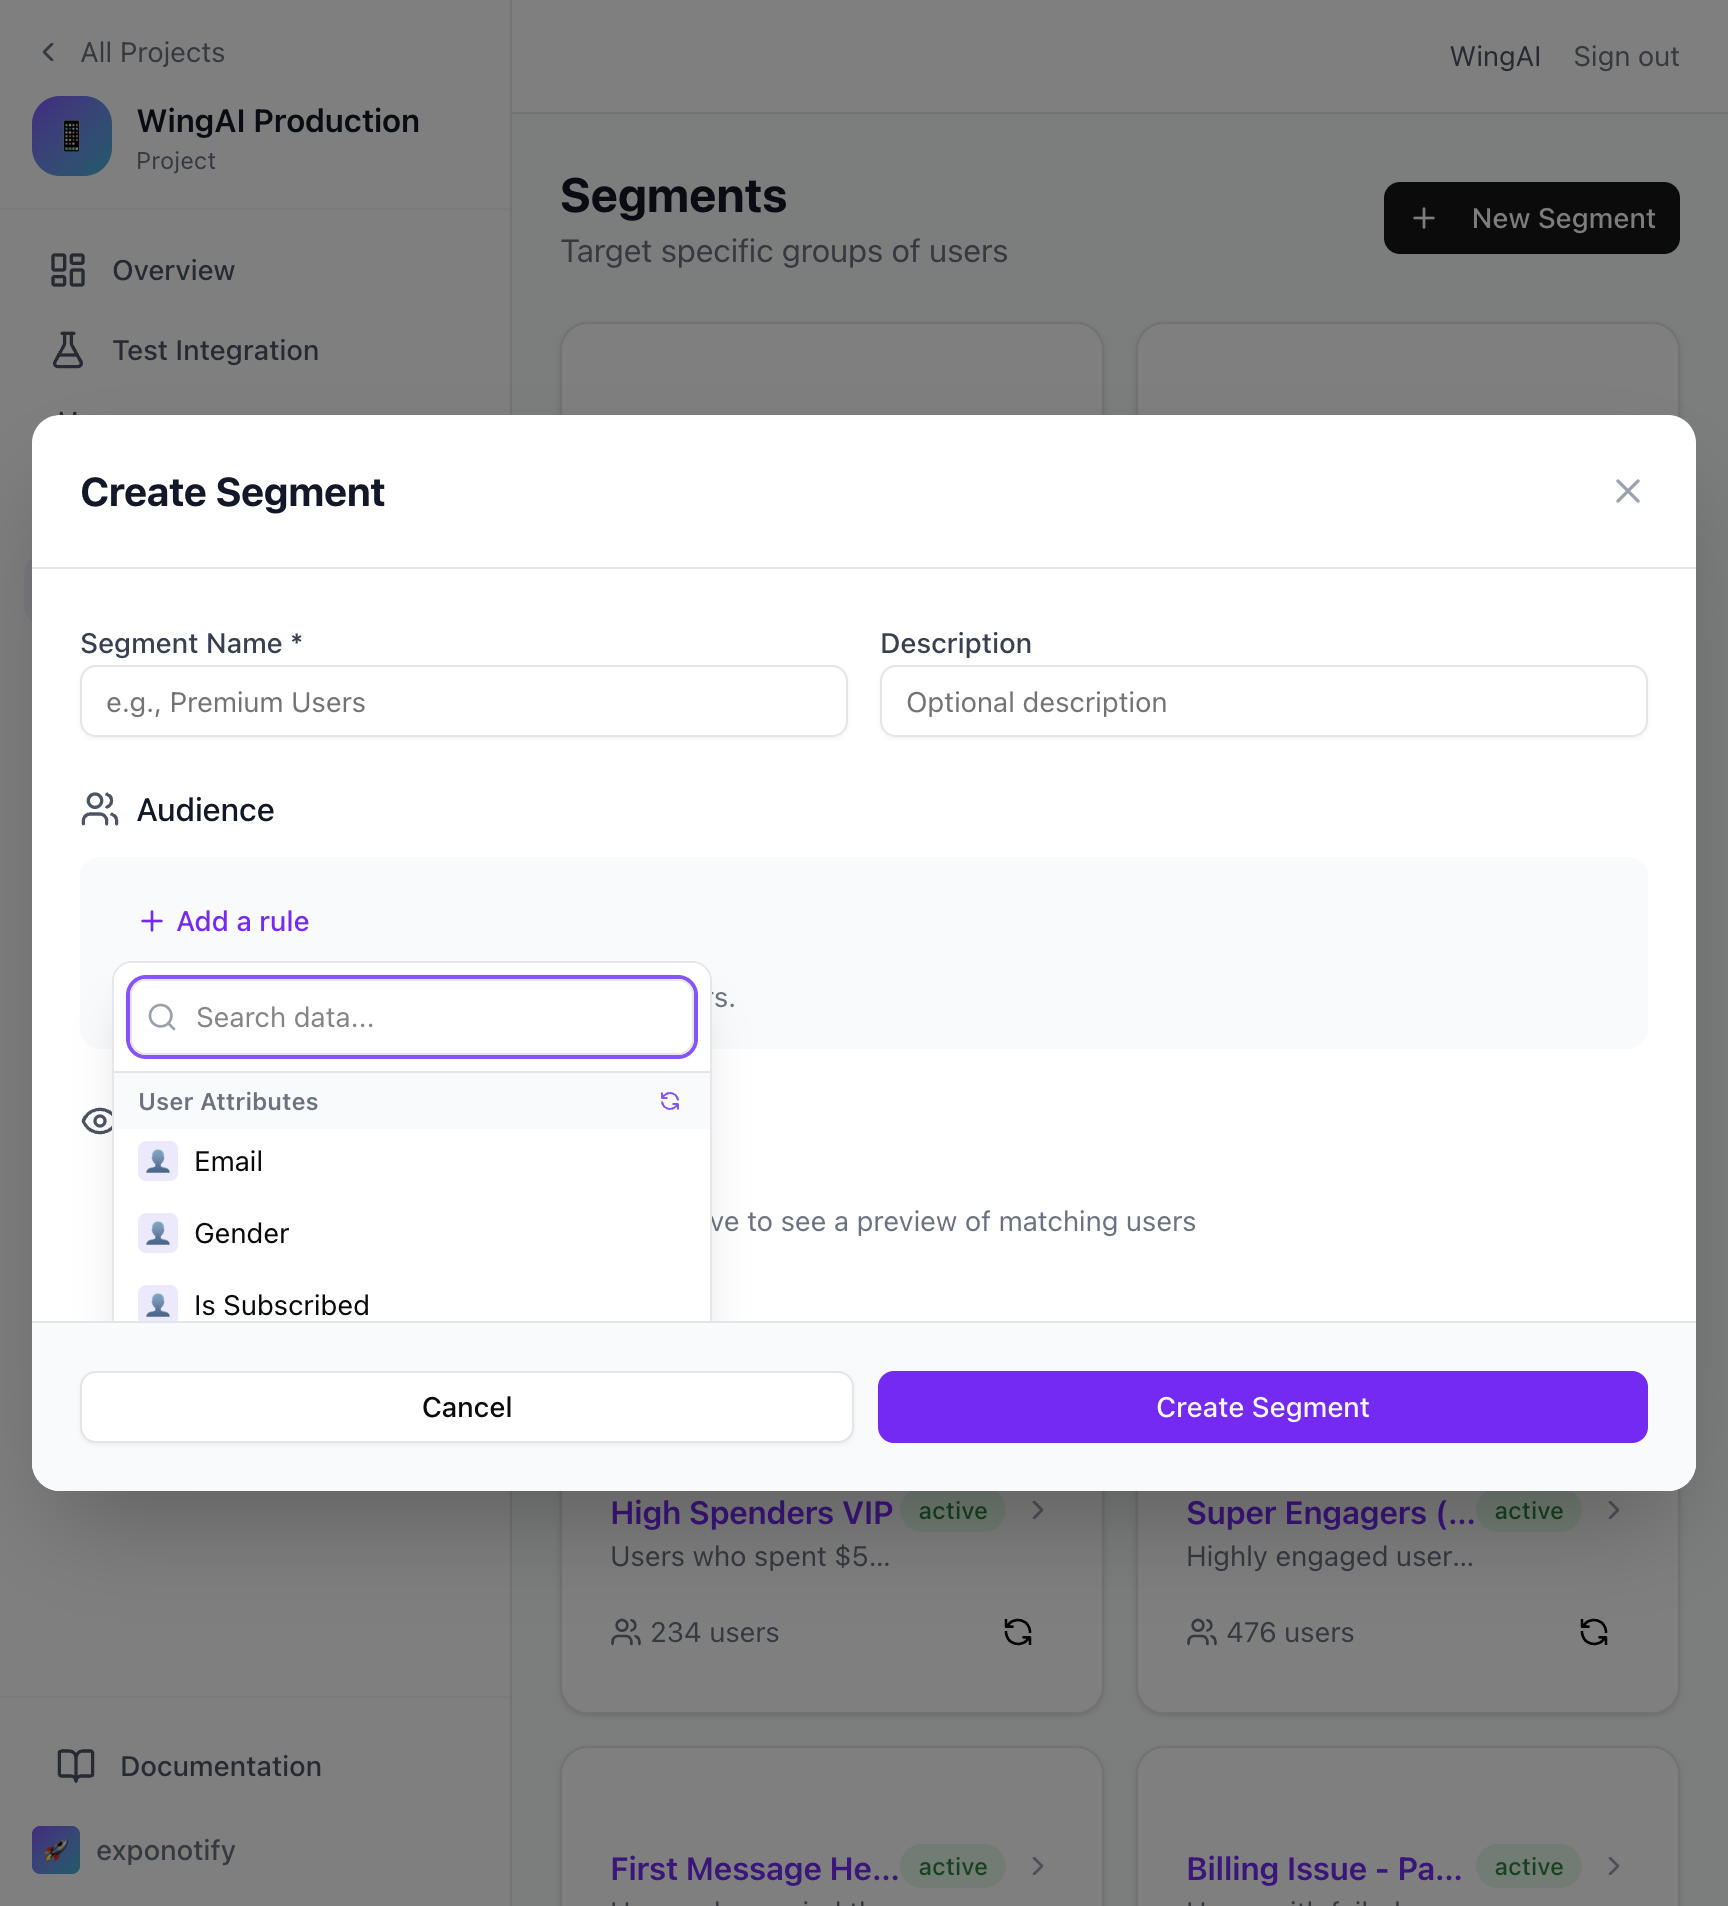
👥 Segment Builder
Build powerful user segments with filters for User Attributes (Email, Gender, Subscribed status, etc.) and Device Properties.
🛤️ Automated Journeys
Create multi-step notification workflows for onboarding, re-engagement, and more.
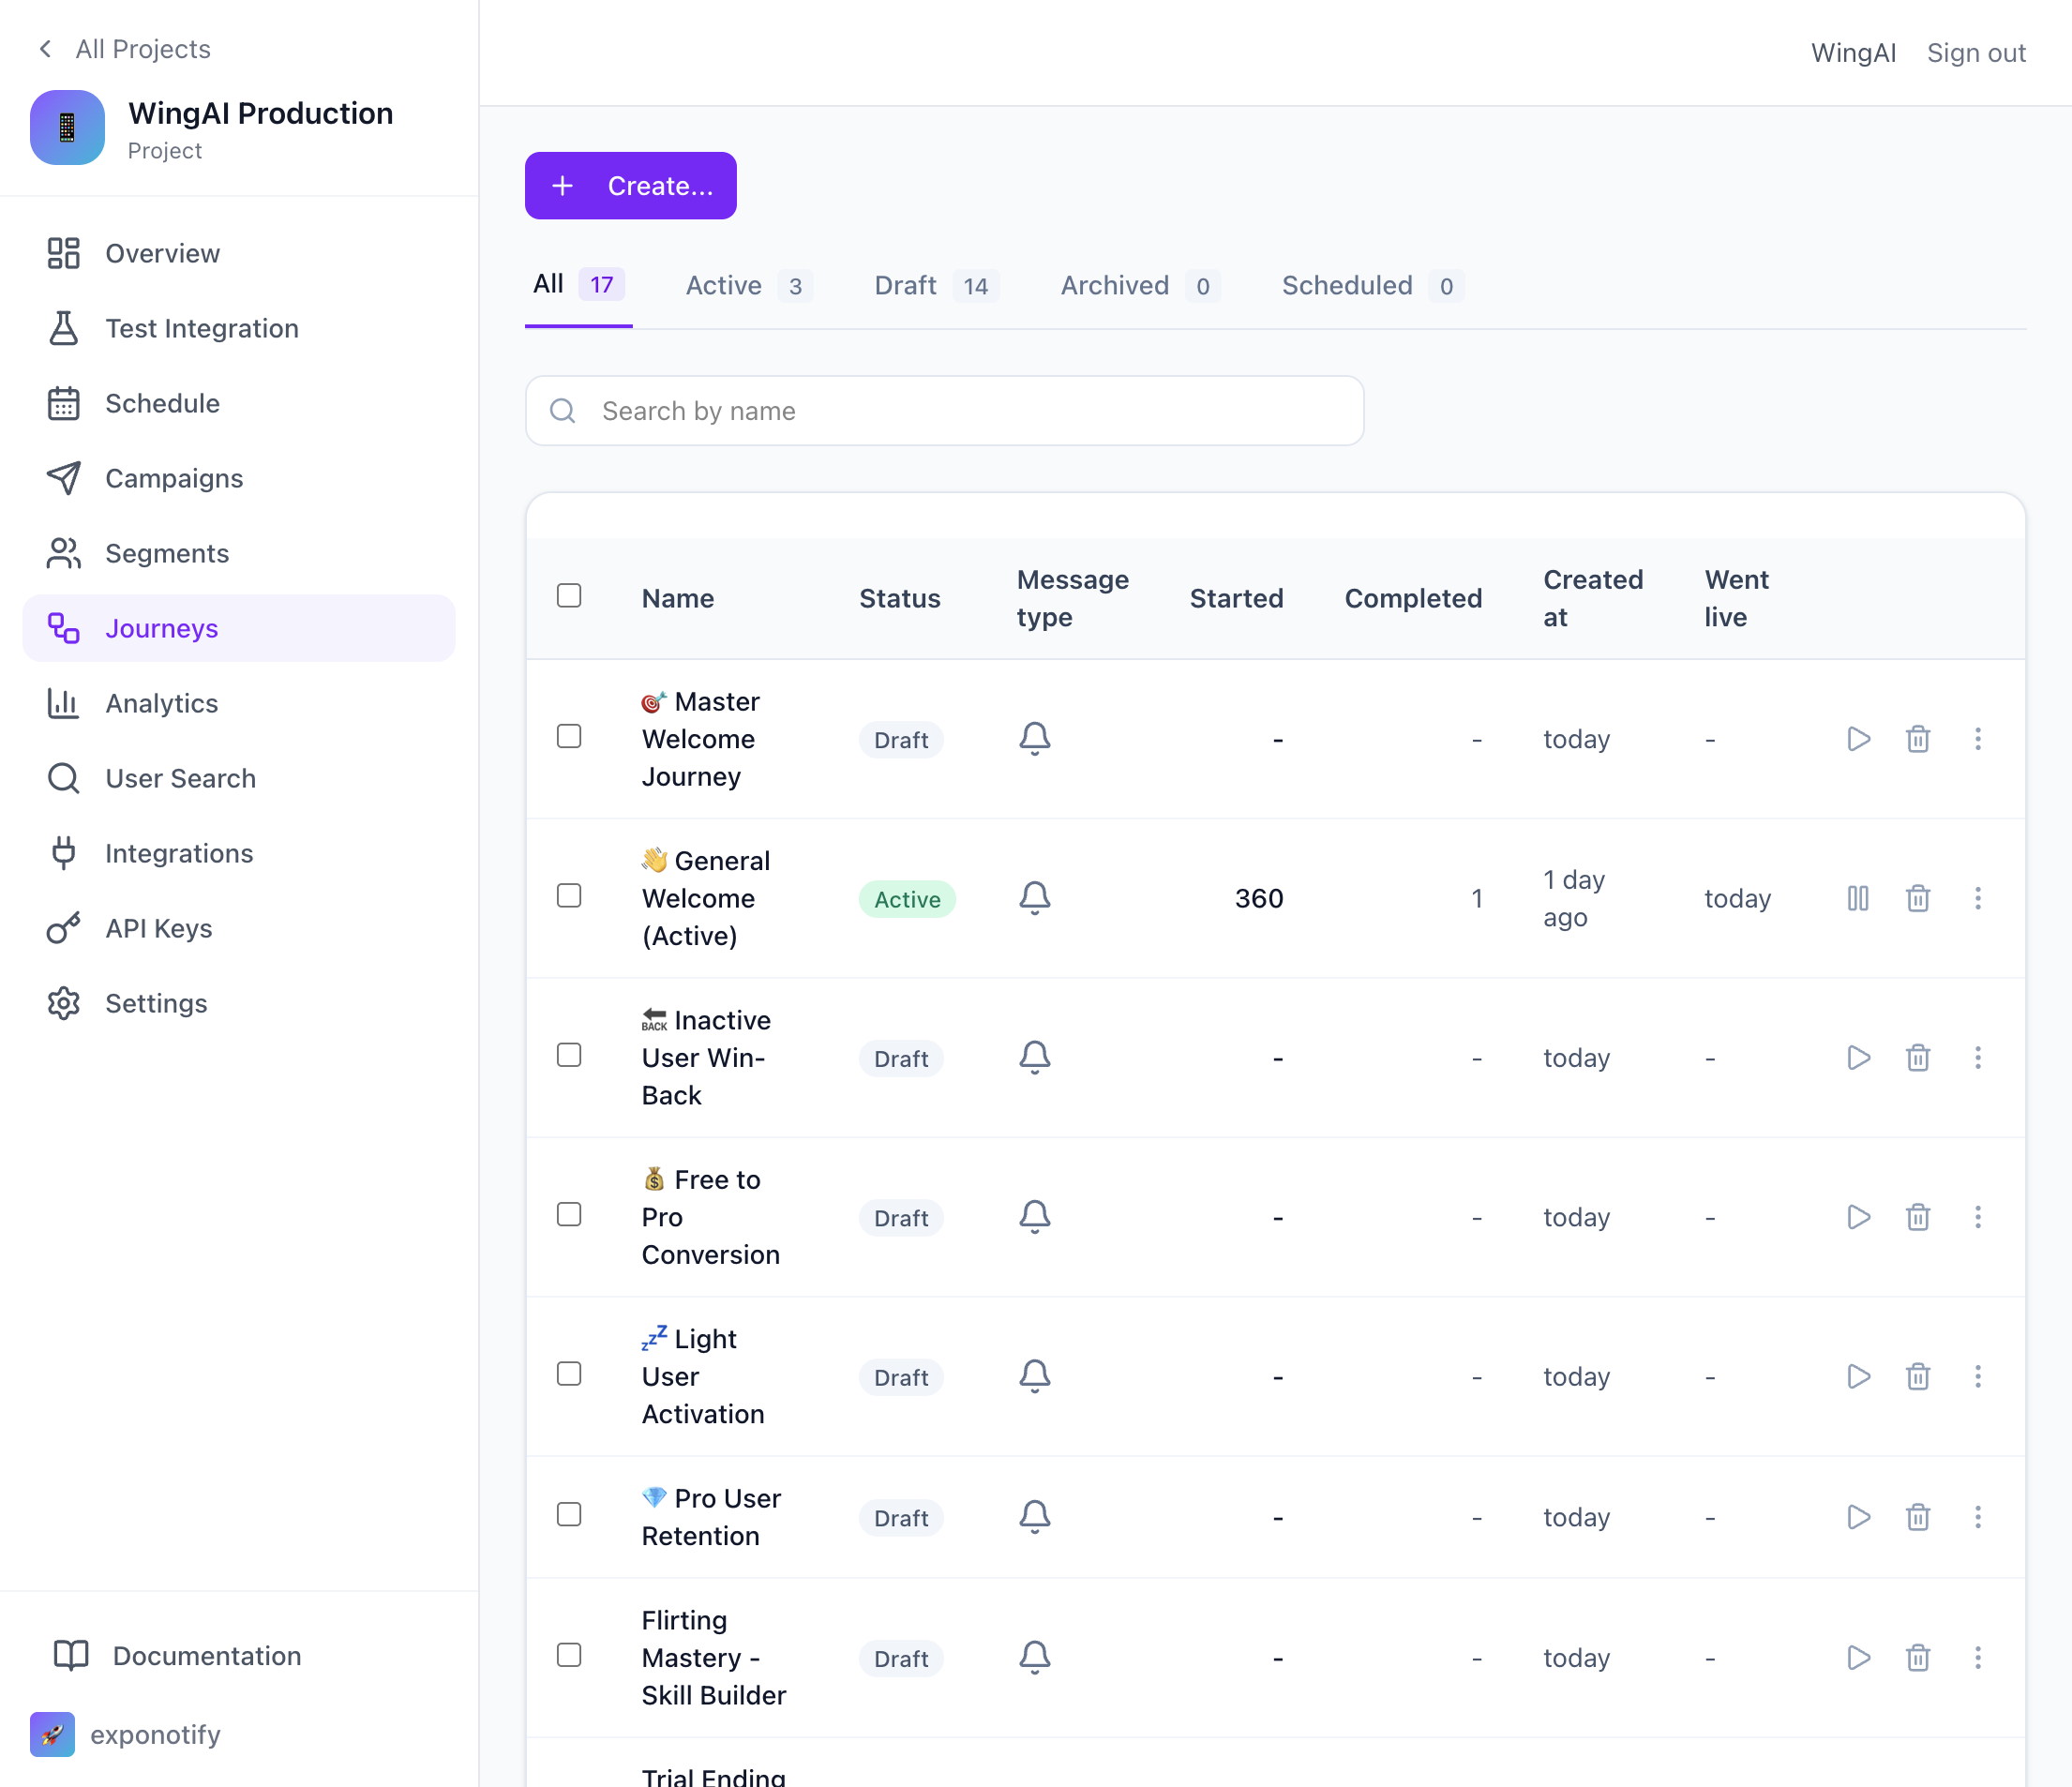
🎯 Journey Builder
Visual drag-and-drop journey builder with triggers, conditions, and send nodes.

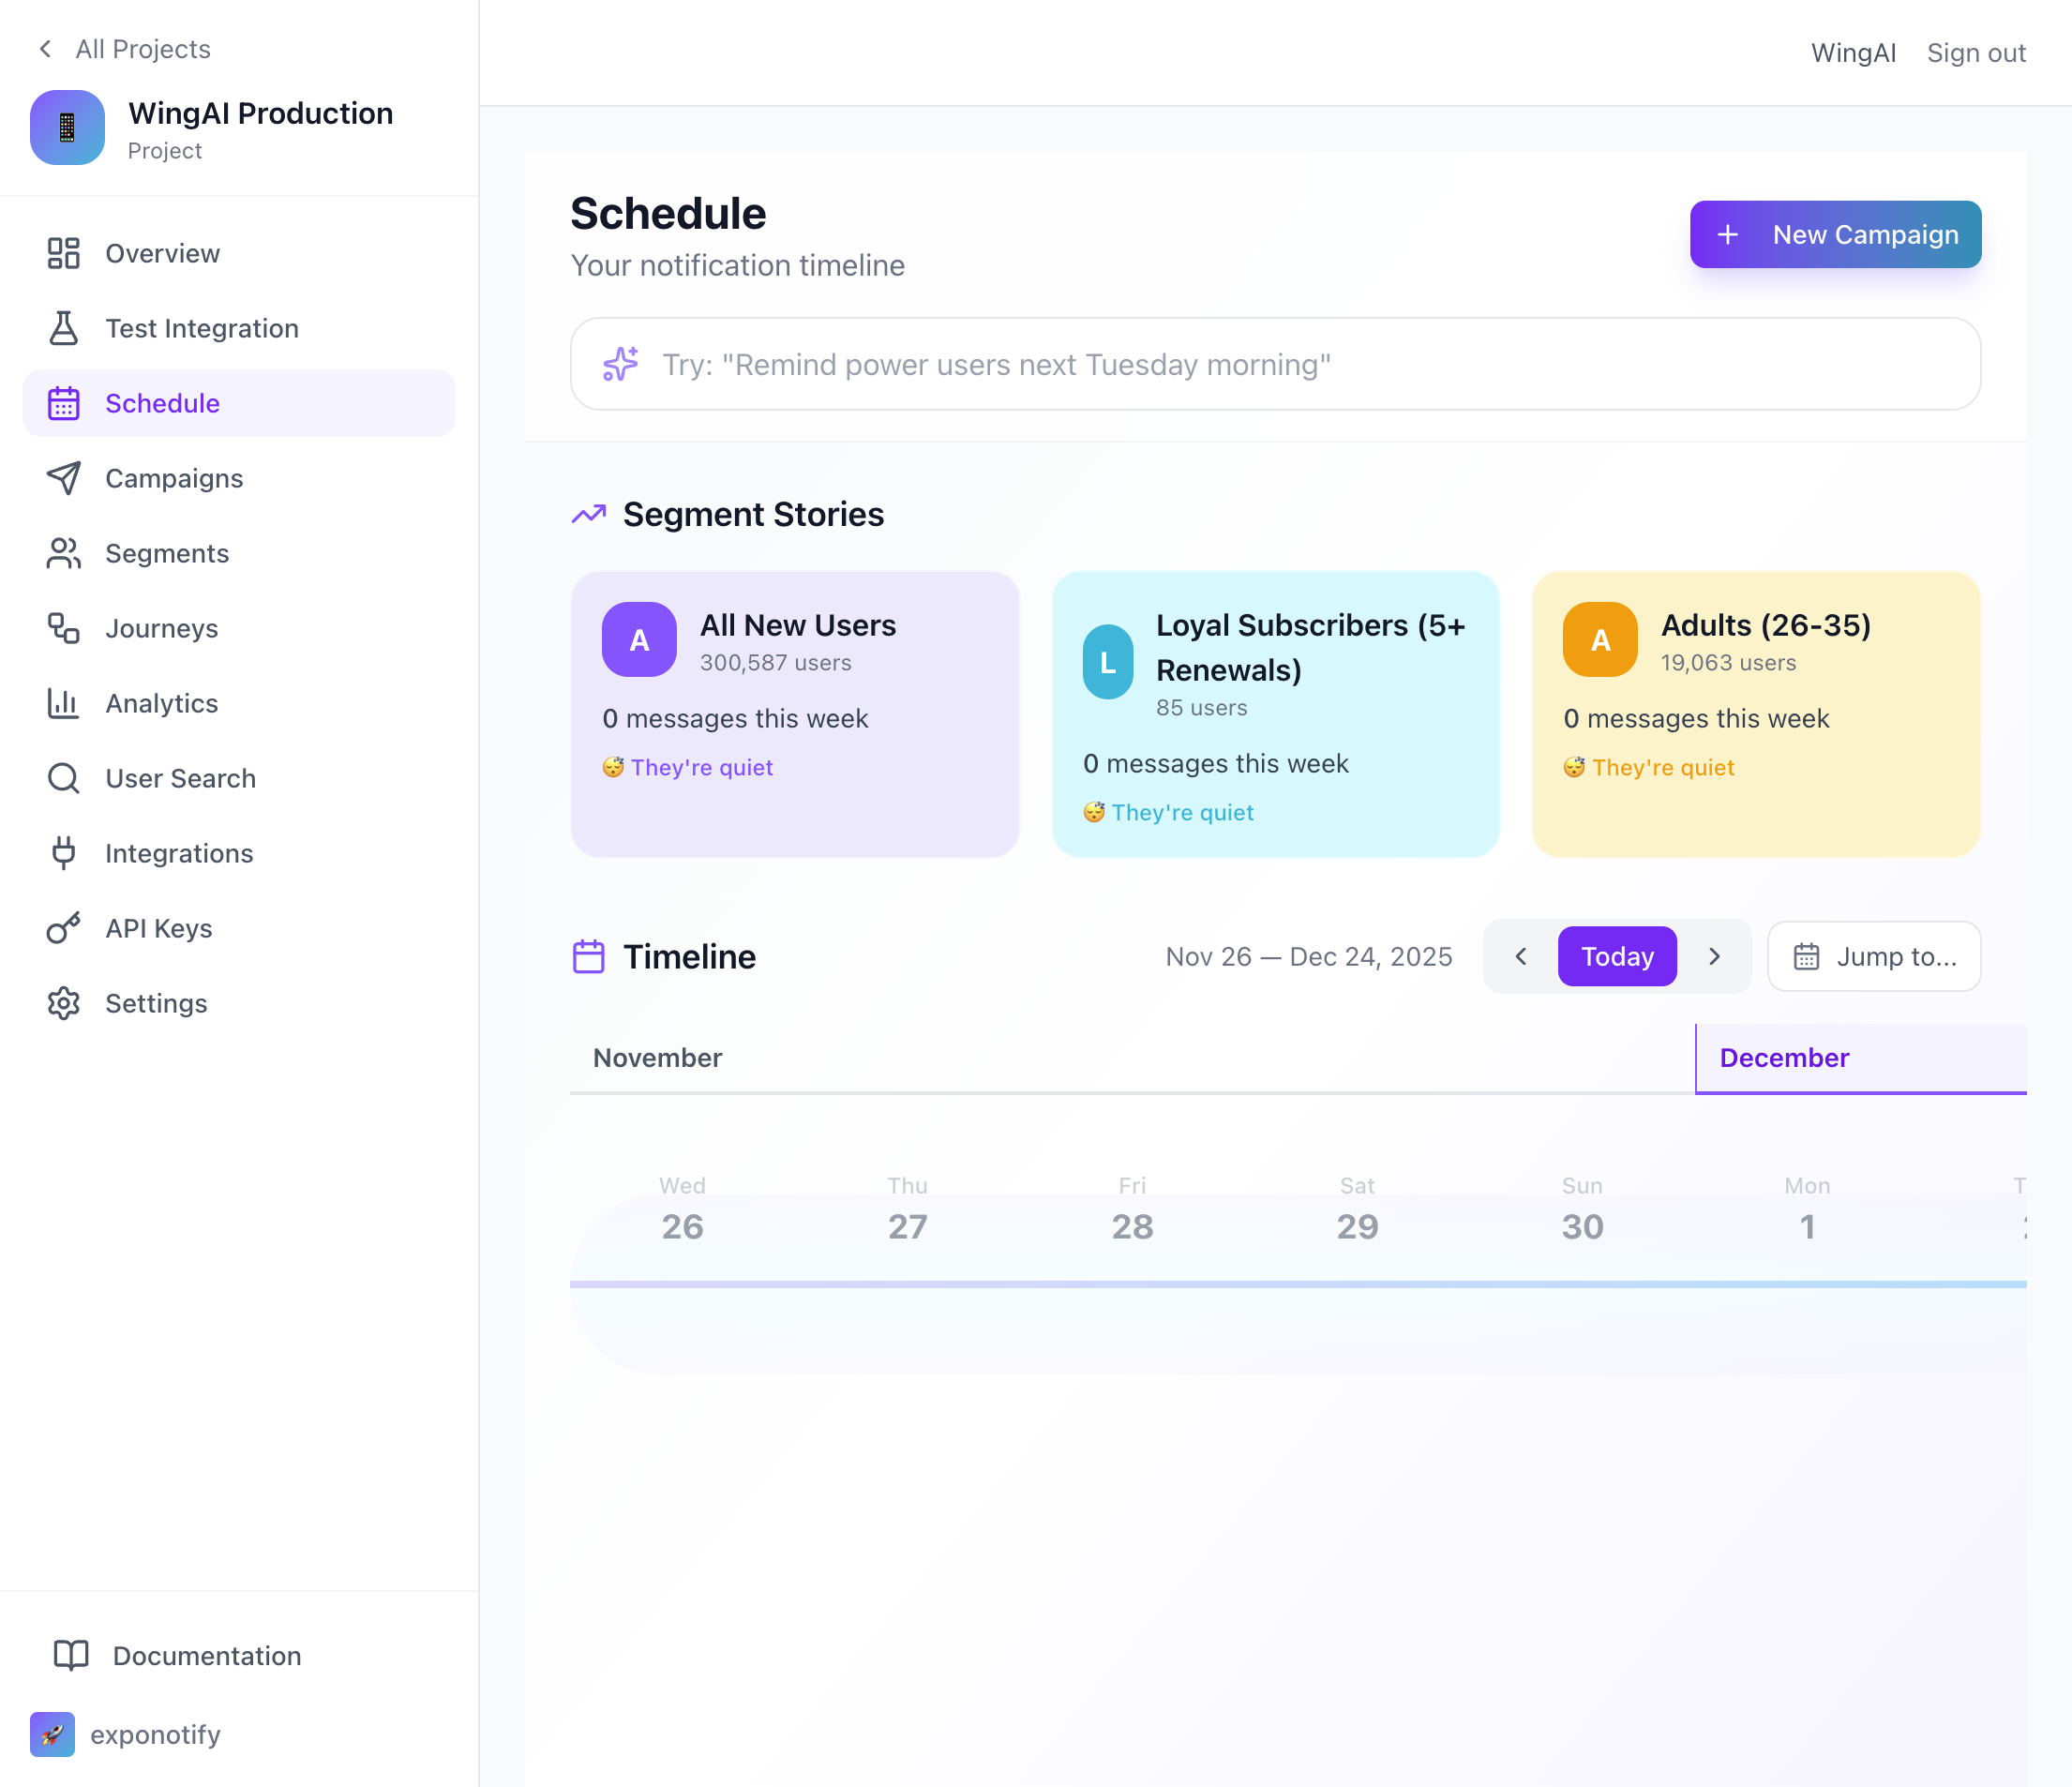
📅 Schedule
Plan your notifications with a visual timeline and AI-powered scheduling suggestions.
Need more?
Check out the full SDK source and examples on GitHub.
View on GitHub →